
Value Match Field Mappings should be used whenever the selected source field has a distinct set of values that need to be mapped to different values on the target.
To create a new Value Match Field Mapping, first select the Target Field from the list of fields in the Field Mapping List, then select Value Match from the New Mapping field below. A new screen is then presented with the name of the target field displayed at the top in bold:

Firstly select the source type (either Source Field or Temporary variable). If you select Source Field the select the field from the Source Field menu below. If its not clear which source field to choose, click on the button to the right of the Source Field to bring up the comprehensive field list with filtering options. (Refer to the article Creating a Simple Field Mapping for more details on how to use the comprehensive field list).
Once the Source field is selected, if it is an enumerated type, the list of valid values for this field are displayed in the table on the right (in the column called Source Display Values). If the source field is not an enumerated type then you can enter the values that you want to map as free text.
If you select Temporary Variable for the Source Type then you must select one of the temporary variables that you have defined for this Form Mapping, (see separate article on Creating Temporary Variables).

In the event that the Source Field value or Temporary Variable value does not match any of the values that you have defined for this mapping, then you can use the ‘On No Match’ field to define the behaviour in this case. The options available for the ‘On No Match’ field are as follows:
|
On No Match Action |
Description |
|
Set Null |
Sets the target field value to Null; |
|
Skip Record |
No target values are set for this record, skips to the next record; |
|
Log Error |
No target value is set but an error is recorded in the log. |
|
Set Default |
The Default value is used to set the target field instead. |
|
Use Source |
The target field is set to the value of the source field. |
Next, click on the Map Fields button to navigate to the Value Editing tab. This tab allows you to define the target values that you want to map to for each of the source values that the source field or temporary variable can take.
In this example we have selected the Status field which has six pre-defined values, (Proposed, Enabled, Offline, Obsolete, Archive, Delete). For each value, enter a corresponding target value using the Target Field and use the Add button to add to the table.

The target values can either be the same as or different to the source values. If you make a mistake, you can use the Update or Remove buttons to modify the table mappings.
If there are a lot of Source or Target values and you need to search for a specific value to use, click on the button to the right of the Source or Target value menu to bring up the Search window:
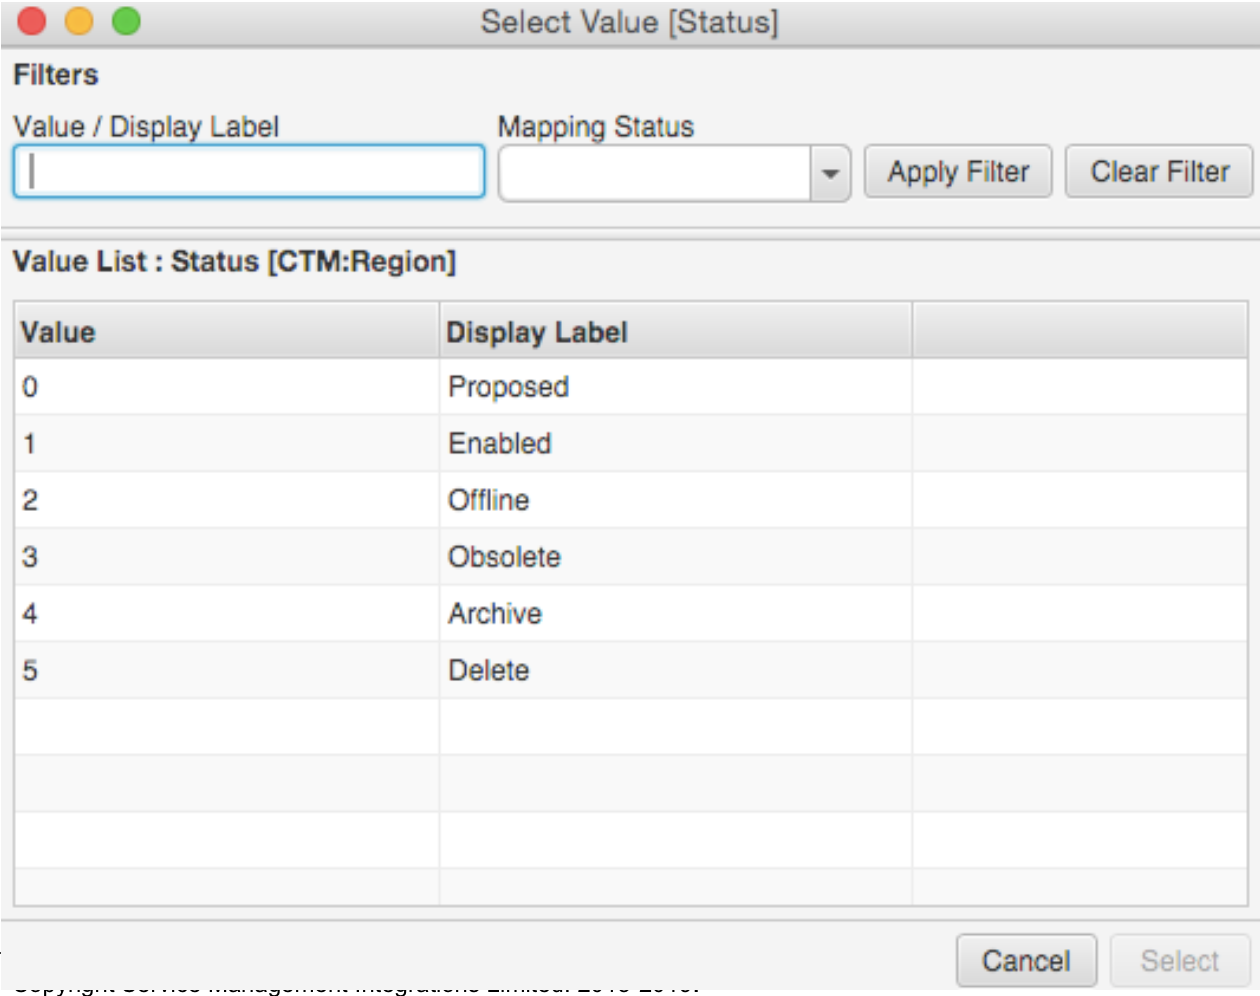
To restrict the list of values displayed in this table, enter a Value/Display Label and/or a Mapping Status (Mapped or Unmapped), then click on the Apply Filter button. To return to the full list of field values, click on the Clear Filter button. Once you have identified which value to use, select the corresponding row from the table and click on the Select button. This will then return you to the main value mapping screen.
If you want to map a character field that is not enumerated, you can simply enter the free text values instead. In the example below, the field values both source and target are entered as free text and added to the table using the Add button.

Once you have finished setting up your field value mappings, use the Validate button on the right of the table to check that the values provided are all valid without saving the changes. The system will identify any invalid values (for enumerated fields) and give you the opportunity to selectively remove them. Once you are finished, use the Apply button to apply and save the field value mappings. To revert to the previous set of value mappings for this field use the Revert button.
To restrict the list of values displayed in the mappings table or change the value/label presentation, click on the Table Options tab.

The table options can be changed if the source or target value is an enumerated field type. By default all rows in the mappings table are displayed. To restrict to just mapped or just unmapped values, select the corresponding Display Rows For option.
For enumerated fields, you can choose to display either the Display Label or the Value for that field. For example, the Status field might have a Display Label of ‘Proposed’ with a corresponding stored Value of ‘0’. After changing the Show Source or Show Target settings, the Field Mappings table is automatically updated to show the field values using the specified format.
Comments
0 comments
Please sign in to leave a comment.