
When to use a Reference Mapping for ServiceNow-ServiceNow migrations
You only need a reference mapping for ServiceNow-ServiceNow migrations if the referenced records on the source and target instance have (or may have) different sys-id values. For many system tables, or if the reference table has been migrated with Precision Bridge using the Maintain Sys-ID option, the records will have the same ID on both source and target. In this case, a simple mapping will suffice and this is very efficient.
Otherwise you can create a field reference mapping to retrieve the required value from a previous (reference) form mapping in the same project. Note that the previous form mapping does not have to be enabled. For more information on best practice use of reference mappings to optimise performance, see this article:
Creating a new Reference Field Mapping
If the Sys-IDs of the referenced records are different on the source and target instance then you should create a reference field mapping.
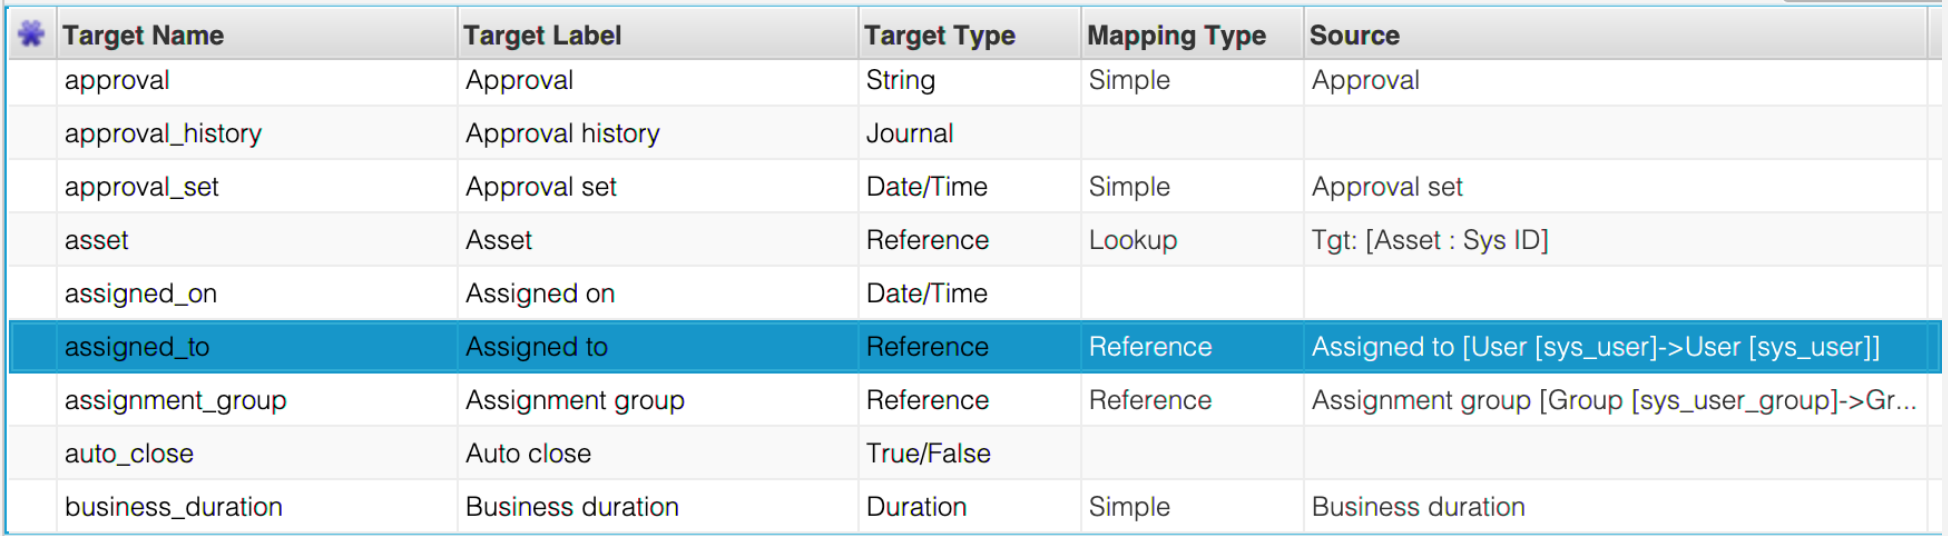
For example, if you are mapping the assigned-to field on any of the task tables and the sys-id of the records in the User table are different on source and target instances then you should create a reference field mapping (otherwise use a Simple mapping).
Before you can create a reference field mapping you must first create a Form mapping for the referenced table. In the above example, you would need to create a Form Mapping for the User table.
The User Table Form Mapping must be positioned to run BEFORE the mapping from where it will be referenced.
To create a new reference field mapping select 'Reference' from the New Mapping field drop down then enter the name of the source field that you want to map. In this example it will be the Assigned To field (which contains the Sys-ID of the source User record).

Next, select the referenced Form Mapping using the drop-down on the ‘Use Key Mapping from’ field. This provides a list of all previous form mappings from the current project. Using the above example, this will be the Form Mapping for the User Table.
Note that the User Reference Form Mapping does not usually need to be enabled if there is no intention to migrate User records (i.e. the user records already exist). In fact if you have a lot of user records then it should be disabled to ensure optimal performance. Some reference mappings need to be enabled under certain conditions (see article on Reference Form Mappings for further information).
Populate Options
When this option is selected the Sys-ID is returned from the Target record. In this example it will be the Sys-ID of the corresponding User record from the Target instance.
If you want to return a different field from the Target record, use the option Populate Using Mapping For field, then select the field that you want from the drop-down list. However, please note that if you are migrating to a ServiceNow reference field, then you should always use the Sys-ID.
If there is no matching value you can define what action to take using the No Match Action field. The options available are summarised in the table below.
|
No Match Action |
Description |
|
Set Null: |
Sets the target field value to Null; |
|
Skip Record: |
No target values are set for this record, skips to the next record; |
|
Log Warning |
For no match and multi match, the target field value is set to NULL and a warning recorded. |
|
Log Error: |
No target field value is set but an error is recorded in the log. |
|
Set Default: |
The Default value is used to set the target field instead. |
If Set Default is selected then the default value must be provided in the field below the No Match Action field.
Similarly, you can control the behaviour if multiple matches are found using the Multiple Match Action Field. These are the same as for the No Match Action field with the additional option of ‘Use First’. If this option is selected then the first matching record is used to set the target value.
Once you have selected the mapping, click on the Validate button to validate the selection without saving. Click on the Apply button to validate and Apply your changes. If necessary, you can use the Revert button to revert back to the previous state of this mapping before the last Apply operation.
Comments
0 comments
Please sign in to leave a comment.